ediabaslib
Deep OBD app
This page describes how to use Deep OBD app.
Download app from Google Play: https://play.google.com/store/apps/details?id=de.holeschak.bmw_deep_obd
Table of contents:
- Manufacturers
- Supported adapters
- First start
- Your first configuration
- The main menu
- Google translation APIs
- Log and trace files location
- Android Auto
- Background image
- Request to delete data send by the app
Manufacturers
Basically the Deep OBD app can operate in two modes, either BMW or VAG. You have to select the car manufacturer first. The VAG group mode (VW, Audi, Seat, Skoda) is still experimental and only supports the protocols KPW2000, KWP1281 and TP2.0. A Replacement firmware for ELM327 adapter is required for this mode.
Supported adapters
The Deep OBD app supports several OBD II adapters:
- Standard FTDI based USB “INPA compatible” D-CAN/K-Line adapters (all protocols)
- ELM327 based Bluetooth and WiFi adapters. Recommended ELM327 versions are 1.4b, 1.5 and origin 2.1, which are based on PIC18F25K80 processor (no MCP2515 chip) (D-CAN protocol only)
- Custom Bluetooth D-CAN/K-Line adapter (BMW-FAST protocol over D-CAN and K-Line)
- ELM327 based adapters with Replacement firmware for ELM327 D-CAN and K-Line (all protocols!). When VAG has been selected as manufacturer, only this adapter could be used.
- ENET WiFi adapters (for BMW F-models)
More details could be found here: Supported adapter types
First start
At the first start of the Deep OBD app you will be asked to extract the ECU files. The extracted files are very large and requires approximately 2.5GB on the external SDCard. An internet connection is required for this to check for update information.
In the next step a configuration (*.cccfg file) must be created. The easiest way to do so is to use the configuration generator. For complex scenarios you could manually create configuration files (see HowTo create Deep OBD pages). After loading and compiling the configuration file, all tabs included in the file will be visible on the main page.
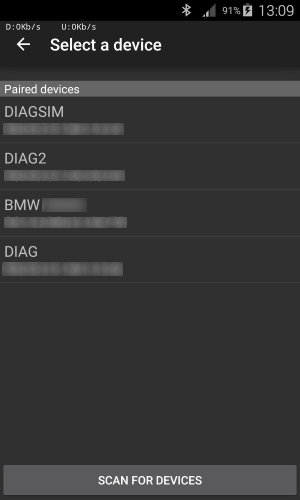
Before connecting to the vehicle via Bluetooth a Bluetooth adapter has to be selected (or you will be asked when connecting). It’s recommended to pair the adapter in the Android Bluetooth menu before using it in the Deep OBD app, because this way a connection password could be assigned.
Your first configuration
Follow the next steps to generate your first configuration (BMW):
- Open the Configuration generator from the main menu
- In the generator menu select the correct interface type and Bluetooth adapter if needed.
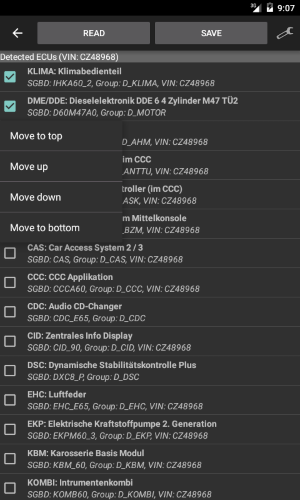
- Press the Read button and wait until the ECU list is populated.
- Select an ECU entry you are interested in.
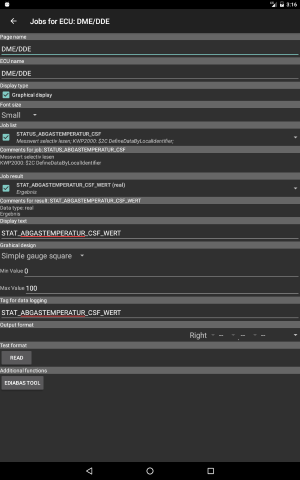
- On the next page select a job and corresponding job result for data you want to see on the main page.
Make sure you have set the checkmarks for these results!
You could test reading the value with Test button below. - Leave the page and possibly select another ECU.
- Exit the Configuration generator and store the configuration.
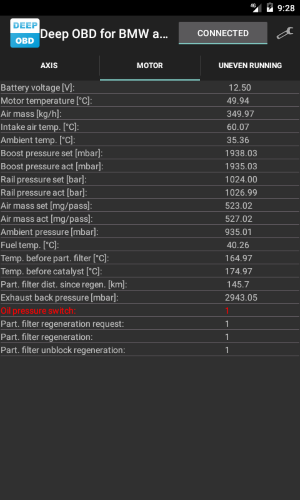
- On the main page you will see the selected ECU tabs and the Error tab.
- Press the Connect button.
- Select the desired tab.
The main menu
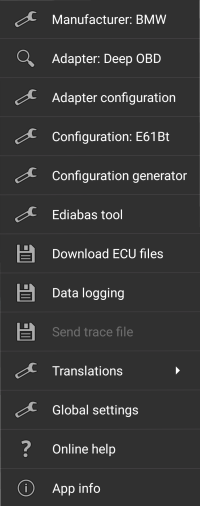
The application has a configuration menu with the following options:
- Manufacturer: Select the car manufacturer with this menu point first. The default is BMW, the other manufacturers are from the VAG group (VW, Audi, Skoda). The VAG mode is still experimental, only for vehicles until 2017-08 and requires a Bluetooth D-CAN/K-Line adapter.
- Adapter: With this menu the Bluetooth adapter could be selected. If the device is not paired already, searching for new devices is possible. This menu is only enabled if a configuration with interface type BLUETOOTH has been selected.
- Adapter configuration: When using a FTDI USB or Bluetooth (non ELM327) adapter, this menu item opens the adapter configuration page. The following settings are available (depending from adapter type):
- CAN baud rate: (500kbit/100kbit) or K-Line (CAN off)
- Separation time: Separation time between CAN telegrams. The default is 0, only change this value if there are communication problems.
- Block size: Size of CAN telegram blocks. The default is 0, only change this value if there are communication problems.
- Firmware update: If a new firmware is available for the adapter, the update could be initiated with this button.
- ENET IP: This menu displays the currently manually assigned ENET IP address and allows to search for vehicles and edit the IP address manually.
This could be also used in hotspot mode (Hotspot active and WiFi off) if the ENET network is connected to the Android hotspot. - Adapter IP: This menu displays the currently manually assigned WiFi adapter IP address and allows to edit the IP address and port.
If the Android device is in hotspot mode (Hotspot active and WiFi off), communication with the adapter is only possible if the IP address is assigned manually.
This is especially useful for adapters with ESP8266 chip, because they could be configured to connect to the Android hotspot automatically.
If the port is omitted in the IP settings, the default port is 23 in hotspot mode (Hotspot active and WiFi off) and if the IP address is 192.168.4.1 (ESP8266). In all other cases the default port is 35000. - Configuration: This submenu contains configuration selection and editing functions.
- Select: This menu allows the selection of the configuration file (
*.cccfgfile). When using the configuration generator the configuration is selected automatically. After selection the file will be compiled. - Recent configurations: In this submenu the last 10 recently used configurations are accessible.
- Edit: Edit the current configuration main (
*.cccfgfile). A suitable XML editor has to be be installed. - Edit pages list: Edit the current pages list (
*.cccpagesfile). - Edit current page: Submenu to edit the currently active page (
*.cccpagefile).- Edit page: Edit the currently active page in the XML editor.
- Font size: Change the page font size directly without XML editor. This is only possible if the fontsize tag is present in the XML file.
- Gauges landscape: Change the number of gauges in landscape mode directly without XML editor. This is only possible if the gauges-landscape tag is present in the XML file.
- Gauges portrait: Change the number of gauges in portrait mode directly without XML editor. This is only possible if the gauges-portrait tag is present in the XML file.
- Result display order: Change order of the displayed results directly without XML editor. This is only possible if the display-order tag is present for all display nodes the XML file.
- Edit other file: Allows to select and edit any configuration (
*.cccpagefile). - Reset XML editor: Resets the last selected XML editor. A new editor has be to be selected again when editing files.
- Close: Close the current configuration.
- Select: This menu allows the selection of the configuration file (
- Configuration generator: Simple XML configuration files could be generated automatically using the informations obtained from the vehicle. This menu opens the configuration generator which allows to create new or modify existing XML files by simply selecting the ECU and job informations.
- Ediabas tool: This is a port of the tool32.exe windows application. Selecting the menu will open the Ediabas tool page.
- Coding: This submenu allow to access the BMW coding online service.
- Extract ECU files: The ECU files are very large, so they have to be extracted at first app start. With this menu item files could be extracted again. An internet connection is required to check for update information.
- Data logging: Selecting this menu entry will open a sub menu with multiple data logging options:
- Create trace file: If the checkbox of this menu is active, a
ifh.trcfile will be created when the application is connected. The trace file will be created in theLogsubdirectory. - Append trace file: If this checkbox is enabled the trace file is always appended. Otherwise the trace file will be overridden after selection of a new configuration or restart of the application.
- Log data: This checkbox enables logging of the display data to a log file. Only those lines are logged, that have a log_tag property in the configuration file. The logfile property in the page node has to be specified as well to activate logging. When using the configuration generator log_tag is set by default to the job name and logfile to the ECU name. Data will be logged in the
Logsubdirectory.
- Create trace file: If the checkbox of this menu is active, a
- Trace file: Selecting this menu entry will open a sub menu with options for trace file handling.
- Send trace file: Send the trace file from the last vehicle communication to the author of Ediabaslib/Deep OBD for further study and bugfixing/enhacements. Important: Data sent is compressed and anonymous.
- Open trace file: Open the trace file from the last vehicle communication with an external app that supports zip files.
- Resend trace file: Retry sending of the last trace file. Only visible if sending has failed.
- Open last trace file: Open the last trace file with an external app that supports zip files, if sending has failed previously.
- Translations: (Only for non German languages) This menu opens a submenu that allows configuration of automatic ECU text translation with various translations engines. Most engines require an API key, but some have also special access tokens. Free translation if very limited in most cases and you have to pay for larger text amount.
- Translate ECU text: If this menu item is checked, automatic ECU text translation is active.
- Translation configuration: For automatic translation with various translation providers. For translation an API Key may be required. This menu assists to select and configure a translation provider. For using Google translation APIs the URLs have to be copied first.
- Clear translation cache: To enforce a new translation this menu resets the translation cache.
- Global settings: Opens the global app settings page.
- Online help: Displays this help page.
- App info: Displays the app version and unique app id.
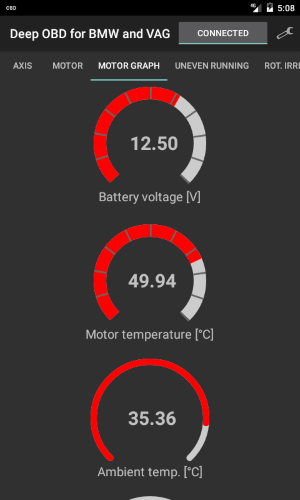
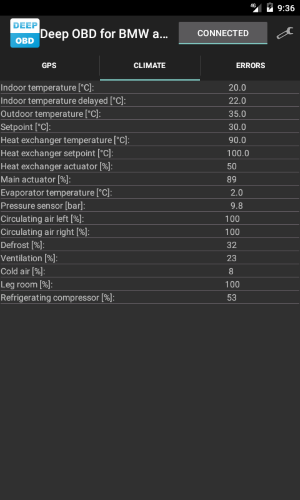
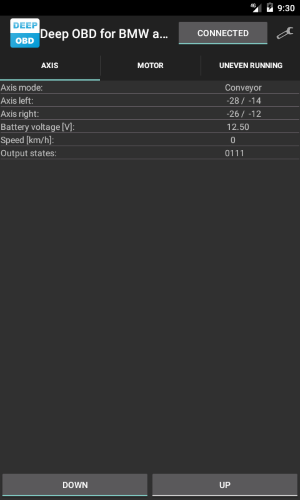
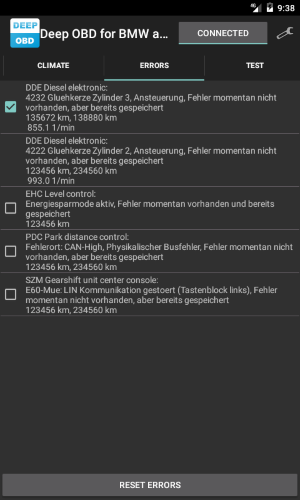
Below are some screenshots from the example E61 configuration:

Google translation APIs
There are public undocumented Google translation APIs, which could also be found in the project translatepy.
You could copy the basic URLs from here and paste them in the Translation configuration Google APIs page, but they could change without any notice.
If one API fails the next one is tried automatically.
https://clients5.google.com/translate_a/t?client=dict-chrome-ex
https://translate.googleapis.com/translate_a/single?client=gtx&dt=t
Log and trace files location
The location of the log and trace files depends from the Android version.
Beginning with Android KitKat (4.4) writing to the external SdCard is not possible any more. For older Android versions log and trace files are stored in a subdirectory relative to de.holeschak.bmw_deep_obd on the external SDCard. For KitKat and above the data could be found in the directory Android\data\de.holeschak.bmw_deep_obd\files of the external SDCard.
The standard log files are stored in the subdirectory Log, whereas the Ediabas tool uses the subdirectory LogEdiabasTool and the configuration generator the subdirectory LogConfigTool.
If sending of the trace files fails, the backup trace files are stored in the subdirectory TraceBackup.
Background image
It’s possible to replace the background image. Simply store a custom Background.jpg file in the directory de.holeschak.bmw_deep_obd\files\Images (The Images subdirectory has to be created first).
Android Auto
Android Auto is now available in the release version of the Deep OBD app.
Visual Studio Settings for Compilation
Visual Studio Android settings.
It’s recommended to install and configure Android Studio before and then use a common configuration.
Update the components in Android Studio only.
- Java SDK location: Microsoft:
C:\Program Files\Microsoft\jdk-17.0.8.101-hotspotor custom:C:\Program Files\Java\jdk-11.0.12 - Android SDK location:
C:\Users\<user>\AppData\Local\Android\android-sdk - Archive location:
C:\Users\<user>\AppData\Local\Xamarin\Mono for Android\Archives - Activate option: Keep application cache
- Activate option: Install Android SDK automatically
- Deactivate option: Use AndroidX migrator
- Extra -> Android -> Android SDK Manager: Enable option Repository complete list (if Android Studio is installed)